How To Sand Without Making Mess (Wood,Furniture & Drywall)
While sanding itself is quite easy it can throw up a couple of problems,one of them being the amounts of mess that it can create.
So can you sand and not make a mess? And if so, how?
What kind of surface can I sand without making as much of a mess?
What are the best sanders out there and what are the best vacuums for cleaning up after you sand? This article will figure out all this and more.
Table of Contents
How to sand without making a mess
Whether it be wood, furniture or drywall you aim to sand, the very nature of the process creates a leftover by-product that usually floats right into the immediate atmosphere. Dust is unavoidable. But what is avoidable is creating a big mess both in the immediate area and elsewhere in the house or workstation you are working at. Sanding is notorious for making a big ole mess, we are going to look at how to stop this!
The best way to avoid making a mess is by taking precautions before you even begin sanding. This can be covering surfaces with plastic sheets, placing a dustpan or vacuum directly below the area you are planning on sanding or using a dust-free sander with a vacuum collector. All of the options are sure-fire ways of mitigating that sanding mess that you have been left with in the past.
Additionally, if you are working on an object that can be taken outside this would also be recommended as it means you have less cleaning up to do, allowing you to spend more time on the important DIY stuff!
Can you sand furniture indoors?
Sanding requires patience and skill to achieve good finishes. Whilst you rub the grain of wood on your table or chair you are constantly going to be creating debris and particles from your sanding. This is not good for the lungs if inhaled in large concentrations and also creates a right old mess in your house for weeks after. Due to this, alongside the mobility of using sandpaper by hand to take the piece of furniture outside and sand it there. Because you are using a bit of sandpaper with your hands you don’t have to work about a power source. Ultimately by taking the piece of furniture outdoors you mitigate the mess that will happen inside. You can of course sand inside but it will give you more work to do than if you just took the furniture outside.
How to sand indoors without making a mess
An unfortunate inevitability of sanding is the mess you are going to create but there are ways to stop it being such a hassle. Putting plastic sheets down on surfaces that are hard to clean or have nooks and crannies is a massive way to stop the hassle of cleaning up. Many also use vacuums or fans aimed at windows whilst they are sanding to suck all the particles in the room out the way. Whilst this is effective for cleaning the mess it is still advisable to wear a mask whilst sanding to avoid any unwanted harm to lungs through exposure to the particles. A final couple of tips for mitigating mess whilst sanding indoors is to keep all windows and doors open to allow air flow and if you are really concerned about mess – use a sander with a collection bag/vacuum.
How to sand kitchen cabinets without a mess.
The thought of sanding dust/wood particles going into your food storage cupboard or into a crevice of your stove is very off putting. That is why sanding kitchen cabinets can be a complete nightmare. But fear not, there are ways round this dread! Firstly, it is recommended that you take off all the doors and drawers which you can from the existing kitchen cabinets and sand these down outside to allow for not only an easier sanding process but also much less mess. It would then be advisable, for any part of the cabinet still remaining to use a sander which has a vacuum attached or has a self-cleaning method. These are super handy attachments for sanding and spare you both the hassle and the worry of sanding in your kitchen.
How to sand flooring without a mess.
Not only is it economical but it saves time and is just smarter to use a large drum floor sander. You would be there for weeks on end with a hand sander and go through thousands of sandpaper. You can hire large floor sanders to save you from buying one and never using it again, or alternatively contract a professional in. These machines usually come with a vacuum extraction system attached. But on top of this I would recommend creating an extraction system using fans or vacuums out of the house to make sure any extra unwanted dust is removed. To be extra careful you can go back to basics and lay wet towels at the other side of the door to stop dust and mess escaping the room being worked on under the doorframe.
Establishing what layers are on your table is important first. Any paint or varnish based products will require you to wear a respirator and glasses whilst sanding for your own protection. Once that’s done I would recommend trying to move your table outside if possible. But sometimes this is not possible and to sand a table without a mess you should place plastic all around the floor below the table to catch the mess. Following the sanding procedure you can easily wipe down the table with a wet cloth to remove any excess mess and vacuum dust debris on the floor/remove the plastic placed down. Of course, a sander with an extraction attachment would help greatly and catch nearly all of the dust.
How to sand a wall without dust and making a mess.
Depending on the size of your wall depends on what type of technique to recommend here. If you are doing a larger area one of the best techniques is to hand sand with a dustpan or vacuum directly below the area you are sanding to collect the falling debris. If it is a smaller area you are planning to sand I would highly recommend using a tile grout sponge which is abrasive and causes minimal mess due to the wet nature of the sponge which collects the dust and particles before they have a chance to spread. This technique is a small stroke of genius.
How to sand a ceiling without making a mess
To stop dust and mess going everywhere whilst sanding ceilings your best bet is using a specialist vacuum sander. Whilst being perhaps an extra tool and expense, these attachments for your sander will save you so much hassle and avoid the worry of airborne particles obstructing your health. These attachments are stuck onto your sander and extract all the dust particles instantly whilst you use your hand sander.
How to sand down popcorn ceiling without making a mess
Somehow popular in the 1950s many still have popcorn ceilings in their houses. Their popularity is beyond me, but to remove them you do need to be careful. Not only do some contain asbestos (which is poisonous and needs to be treated by a professional) but it also creates a right mess. It is really not recommended to sand popcorn ceilings. An easier way to remove it is to wet the surface and use a scraper of some sort to scrape away the ceiling. This leaves a flat finish which can then be sanded like a normal ceiling to smooth. During the removal of the popcorn ceiling, you are going to want to have plastic down on the floor to avoid mess and use a container or vacuum to catch debris as it is removed. To be honest, the easiest way to replace popcorn ceiling is to plainly plaster over it, trouble-free.
How to sand drywall without making a mess.
Drywall is notorious for creating even more mess than normal sanding. The fine particles created from the filler literally get everywhere. The best method is getting a sander with a vacuum attachment, but if you are looking to complete this job without going to the shops there are some helpful tips to mitigate mess whilst sanding this infamous substance. Helpful ways of stopping this are dustpans below your sanding area or sticking tape against the wall with half the tape attached to the wall and half the tape facing stick side up to catch all the falling fine particles, this is a genius idea. But the best way to sand drywall is wetting the area first.
How to wet sand drywall without dust.
To wet sand drywall you are actually not even going to use a sander. Proceeding with a bucket of water and an abrasive sponge you essentially rub the area with rounding motions to ‘smudge’ the filler smooth, just like sanding but without the horrible mess.
Does wet sanding drywall really work?
If you are looking for a smooth finish, then yes wet sanding drywall does work. However, due to the nature of sponges it can produce a wavy and uneven surface as they are malleable compared to the traditional sanding block you would use. You also run the risk of making the affected area too wet and compromising the integrity of the drywall. This is something important to note when applying your sponge – it’s meant to be damp, not sodden. At the end of the day, though, wet sanding smooths the surface out for paint application and creates absolutely NO DUST. It is certainly enticing.
Best sanders with dust extraction?
Now we have gone over why sanders with dust extractor attachments on them are so useful, now let’s have a look at some of the best on the market to get your hands on for that next DIY job.
The Makita BO5030K 5″ Random Orbit Sander boasts a larger price tag than other sanders on the market but it is worth every penny. Easy to maneuver with a variable speed and a 300 watt motor, this machine can cover a serious spread of work. It has the power to blast through large projects quicker but also the precision and delicacy to work on small more fragile objects. The most impressive part of this is the dust extraction equipped to this machine though. Not only does it have its own dust collector for minimal dust but it also allows for an attachment of your household vacuum which almost eliminates any mess you would traditionally be faced with.
Whilst you may want to own your sander, sometimes, for things like flooring your own handheld sander is not going to do the trick. The Lagler Hummel 8 inch floor sander is the daddy of all sanders and should be looked to be rented out for any big floor sanding job you are doing. A clunky piece of kit it struggles to appeal aesthetically but the dust collection and sheer power of this device will help you sand your floors with ease.
The very lightweight yet quality built WEN Electric Drywall Sander is brilliant value. It sports a long handle that can reach ceilings but does falter alongside its rivals in its inability to adjust this handle to longer or shorter lengths. The dust collection system on this device is very impressive with easy attachments for vacuums, so much so that this device is actually recommended for contractors and professionals. Infact, it is claimed that the extraction attachment will remove 90% of debris and mess that would otherwise be created, pretty neat. It does face difficulties with certain vacuums not being able to fix to it but this is minor in the grand scheme of the sander.
Vacuum for sanding dust
Using a vacuum to collect the dust from sanding can sometimes actually breach the warranty on some vacuums, but it is worth the risk to clean up the dismal mess some sanding jobs can create. What’s more, increasingly nowadays purpose built sanding dust collecting vacuums are becoming increasingly accessible and cheap for the average punter. This means you can get a machine designed for this exact purpose instead of irritating your partner by clogging up the household vacuum with sanding dust.
Can you use regular vacuums to collect sanding dust?
Technically you can but it is a risk. Due to sanding dust particles being so small they often clog the machine’s filters and cause the vacuum to spew the dust back into the air again.
Best vacuums for sanding dust collection.
The Dewalt DXV10P Wet&Dry Vacuum is one of the best budget dust collecting vacuums on the market for picking up sanding debris. It works particularly well with drywall residue and has the ability to mix between both dry and wet cleaning processes. Equipped with a large storage it can be used for big projects and is easy to clean out when needing to dispose of the dust that has been collected. A very good budget option for those looking for a reasonable vacuum for home use.
Undoubtedly the best vacuum for sanding dust collection on the market is this Bosch 9 Gallon Dust Extractor , but this is reflected in its inflated price. Despite being hugely expensive for the average punter this piece of kit is remarkable in its vacuuming capabilities. 9 gallon container capacity and sturdily built to withstand any working environment. It also has automatic filter cleaning to make sure of no blockages so can handle any kind of sanding dust. This product is one for professional use.
How to clean dust off walls after sanding
The easiest way to clean dust off walls following a spot of sanding is plain and simply a wet cloth. The moisture adheres to the fine particles and removes them with ease. Many are against using wet cloths on their walls and so the next best alternative would be to use a tack cloth and rub the wall clean of any debris.

 While sanding itself is quite easy it can throw up a couple of problems,one of them being the amounts of mess that it can create.
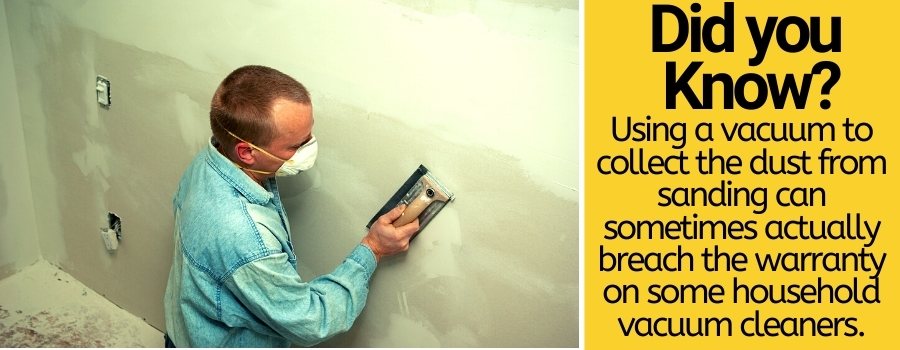
")
")

")
")
")