Drill Bits for Ceramic Pot (What Drill bit to Use & How)
Have you always wanted to start your own little herb garden at home?
Only see ceramic pots that don’t have holes? How do you even know what to use when you drill a hole in these pots?
In this article, I’ll walk you through the exact process to drill holes into ceramic pots , figuring out when to use a specific bit when drilling, and how to walk away with nice clean drill holes in your ceramic pots.
Table of Contents
Best Drill Bits For Ceramic Pots
Drill bits meant for tiles and glass will be perfect for drilling holes ceramic pots. Since ceramic is very brittle as it is produced from clay being heated at extremely high temperatures, these bits will ensure that the hole you drill will not shatter the pot entirely. If you choose any other drill bit like a twist one that is designed for wood and metals, you will have an extremely hard time trying to make a hole in your ceramic pot.
This is because the outermost layer is a glaze that makes the surface smooth and slippery. Your drill will end up sliding around and at its worst, you can definitely injure yourself if you do not use the drill properly. With this in mind, you will need carbide-tipped drill bits in order to work with ceramic as there is a lot of science involved but I won’t bore you to death with that until later on if you truly are curious about the properties of a carbide-tipped drill bit.
Can you drill holes into a ceramic pot?
I can guarantee you that this is 100% absolutely possible and that you do not have to break your back in order to accomplish this task. This is ideal for someone who went to a plant shop and wanted to begin their own little garden at home. If you don’t have a large patch filled with soil in your backyard, then a ceramic pot will do. Most of the time, these tiny aesthetic pots will come with a smooth bottom, with no holes for circulation. You will need to drill holes under the pot otherwise your plant will easily perish and die. This is because plants require drainage to promote air circulation within the soil of the plant and to drain out excess water in the soil.
If there are no holes in the pot, you will be unable to tell how much water is not absorbed by the soil, resulting in waterlogging of the plant a.k.a drowning the plant in its own water. Another important reason is that the plant roots can rot easily, and when the roots of the plant go bad you cannot revive the plant by simply watering it more or offering more sunlight. One key factor you should consider when drilling your hole in your ceramic pot is whether your ceramic pot is glazed or not.
Glazed ceramic pots will require a bit of extra work to get that fine clean drill. Another tip you should keep in mind is when you’re drilling. For ceramics, there is a certain speed you should be drilling at, too fast drilling will lead to heat buildup and possibly ruining the durability of your drill bit while drilling too slow will probably not cause any penetration to the ceramic.
What types of drill bits will work best for ceramic pots?
There are three main types of drill bits for ceramics: earthenware, porcelain, and stoneware. For unglazed earthenware ceramic pots, a masonry drill bit with or without the carbide finish should suffice. If they are glazed then a tile drill bit is preferred as they are a bit sharper than the masonry ones. Diamond tipped drill bits will also work as they spread the pressure evenly throughout the pot, causing it to not shatter immediately. The same thing applies for stoneware and always use a tile bit for porcelain as it will always come glazed.
Types of drill bits for Ceramic Pots
Not all drill bits are created equally, especially when trying to drill a hole in your ceramic pot. I can definitely assure you that if you choose the right drill bit the job will be 10 times easier. Normally drill bits are classified by the shape and material coating as each of them have their pros and cons. I’ll show you every type of drill bit and whether it is suitable for this application or not.
Twist drill bit
This the standard drill bit that everyone gets when you buy a drill. This drill bit is equivalent to the one size fits all approach, meaning it is very versatile but the quality of drilling might not be that great. I would only recommend this drill bit if your ceramic pot is not glazed and you do not wish to spend a few dollars for better drill bit meant for ceramics
Brad-point drill bit
This tip is similar to the twist drill bit, except for the fact that the tip has a W-centered shape that provides stability after piercing through the material. This drill bit is meant for penetrating wood so obviously this would not work for drilling ceramic pots.
Auger drill bit
This drill bit just an extension of a twist drill bit and is usually meant for wood also. I would advise against this drill bit as you may lose stability due to its elongated length.
Spade drill bit
This two-prong drill is a sharp blade with a screw tip in the middle. This drill bit is capable of drilling large holes but will probably be too big for what you are looking for. This drill bit is a pass for me because it is capable of also destroying your ceramic pot.
Forstner drill bit
This drill bit can create clean holes with a flat surface. This drill bit is awesome for wood but pretty much sucks against ceramics. Avoid getting this tip unless you plan on doing a lot of woodwork.
Countersink drill bit
This drill bit has a very sharp tip meant to drill deep holes. This bit is normally used for wooden and countertops as it creates a surface to apply a fastener in. You will not need to fasten as you want circulation for the pot so do not buy this drill bit
Step drill bit
This drill bit works on metal and wood. This one is responsible for polishing and expanding the size of the hole after the initial drill. This tip is optional if you want to make your holes bigger but unless your pot is really huge, I do not think you need it.
Tile drill bits
This drill bit is ideal for drilling a hole into ceramic pots. This drill bit comes with a carbide finish, meaning it has carbon and another metal mixed into it. This tip can smash through the glaze layer and the tip has gripping properties that allow for clean finishes on your ceramic pot.
Spearpoint drill bit
A great alternative to the carbide drill bit, it has a spear tip to ensure precise drilling so that you do not damage the ceramic completely. However, if the ceramic is glaze then I highly recommend using the tile drill bit instead to avoid slippage.
The heavy-duty drill bit compared to the rest. This drill bit can withstand concrete and metal so you know it is very powerful. However, power is not everything and this X-shaped drill bit will only work on unglazed earthenware pots.
Now that you know all the types of drill bits there are, here are my personal recommendations for ceramic pot drill bits:
Bosch GT600 1/2inch Carbide Tipped bit
a Standard Quality Bosch Drill bit especially suitable for ceramic pots, this one will do most of pots whatever they are glazed or unglazed with ease.
There are various 5 piece Diamond Drill Bit sets available, not as long-lasting as bosch and probably not as quality however enough to do a few holes and they come in a lot of sizes!
How to drill a hole in a ceramic pot?
When dealing with unglazed pots, you have an advantage that that advantage is water. Since there is no glaze, the pot can absorb water to decrease the chance of the pot breaking when you drill it. I recommend at least letting the pot sit in water for about an hour at least. After you shake off the excess water, you will need painters tape to prevent slippage. You want to tape over the places that you intend to drill over. Make sure you finish this step before the pot dries again.
Grab your masonry or tile bit (start from small to big if you have multiple sizes) and position the drill over the part you plan to drill. Make sure that you do not apply pressure while you drill, you are only there to guide the drill bit to the other side of the ceramic. If you are afraid of getting dust in your eyes, wear a pair of safety glasses. You can also add a little bit of water to prevent too much dust from forming as you drill. Once the hole is made, continue until you are done. You can switch tip sizes if you plan to make your holes bigger. Remember to drill slowly first then increase the speed once you have broken through.
How to drill a hole in a glazed ceramic pot?
The process is similar to the unglazed pot but you have one less additional step which is the soaking process. The glaze protects the pot from taking in water so you can skip to taping over the area you plan to drill in. I highly recommend that you do not skip this step for glazed pots as the glaze makes the surface slippery. Another plus is that the tape can catch the glaze chips as you begin to drill. When you begin drilling, start slow, and then increase your speed as the hole becomes apparent. You will need water, especially during the drilling process as glazed pots overheat really quick as you are dealing with the full hardness of the ceramic pot also.
Pouring water as you drill will cool the drill and pot down, preventing seizure while drilling. If you start to see additional cracks forming while you drill, pause for a bit, and rub some waterproof silicone sealant along the cracks of the pot. Feel free to pause drilling anytime when you need to add more water since it is your best friend when it comes to drilling ceramic pots. Once your are finished, be sure to wash down the pot with water to clear off the dust from the glaze and the ceramic altogether. You can also continue to switch tip sizes if you plan to drill bigger holes.

 Have you always wanted to start your own little herb garden at home?
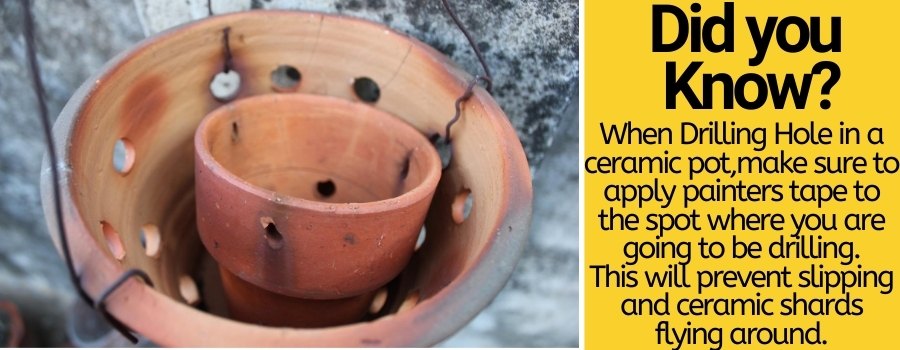
")

")
")

")