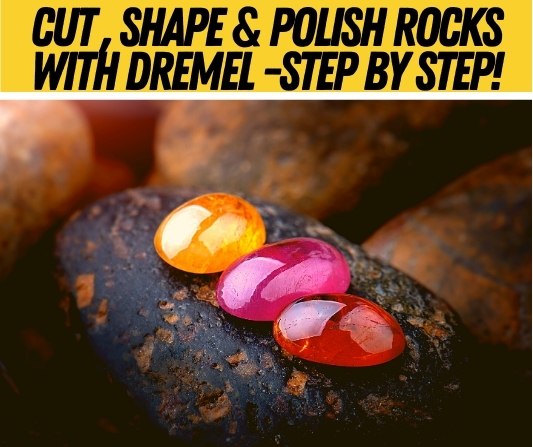
How to Cut,Shape & Polish Rocks With a Dremel (Step By Step)
We are gonna dive into a step-by-step guide on how to cut, then shape, then polish your rocks and stones.
Whether you are a beginner or intermediate looking to cut rocks, carve stone or shape gemstones, you can find out all you need to know about this process below and also discover just how useful a Dremel can be in polishing some gemstones that you may have found yourself.
Without further ado, let’s get cutting!
Table of Contents
Can Rocks/Stone be cut with a Dremel?
Dremels are pretty handy pieces of kit to have lying in the garage. Their versatility is immense and they can be used for almost anything – provided they are equipped with the correct attachment – from sanding to cutting wire around the house. Using a dremel, we are going to look at how to cut, shape and then polish any given rock.
I know I said dremels are good for anything but it’s important to note that the type of rock you are planning on cutting does matter. Normal, soft rock is malleable and easy to shape due to its texture. If you are looking to cut harder or larger pieces of rock/stone, you should maybe look at a tile saw or angle grinder as an alternative, purely because the dremel would take you ages and provide you with a poorly angled cut.
This is particularly true of larger rocks/stones which would just be unmanageable – it’s like using a hand saw to chop through a tree log, you’re just better off with a chainsaw. Despite this dremels are actually hugely handy at cutting and shaping rocks/stones and particularly handy at working with gemstones, because of their intricacy and accuracy and have a renowned status within arts and crafts because of their positive attributes.
What dremel attachment bit to use for cutting rocks?
Before you start going at that rock, there are a few things you should have in place first. Importantly, a diamond bit attachment for your dremel is crucial.
Without this, the dremel is going to struggle and most probably stutter its way through the rocks/stones. Once this bit is attached the dremel could spin its way through almost any small rock that needs to be cut. The ‘diamond’ bit of that might send you into a frantic flush of financial worries, but do not fret, these attachments are not expensive whatsoever. Cheap and easy to find in any good hardware store or online here these bits are going to be a necessity to cut through your rock/stone and carve it in the way you want.
How to cut rocks with a dremel?
Now, as I mentioned previously, provided you don’t have an excessively large rock/stone that you require slicing (if you do, save yourself the hassle and get an angle grinder or tile saw) then you can easily use a dremel to slice your way through the rock to cut it into whatever shape you like. Before you go hacking at your lovely rock or stone though you want to have a read of this.
Items you will need:
To make sure you get the perfect, smooth finish everyone would desire on your rock, you need to have a few pieces of kit before you start cutting. You’re also going to need the following before you start:
When you have got all of this kit, you are ready to rumble. Now let’s find out the process of how you can cut rocks with a dremel multi-tool.
Step by step guide on how to cut rocks with a dremel
Now, time to get down to the nitty gritty (ha, get it? Because grit is stone and we are talking about cutting stone? Na? Okay… I’ll see myself out). You want to make sure that you have your correct dremel tool and diamond bit to hand and throughout this whole procedure remember to never touch the bit when the power is on on the machine, it only leads to one thing – disaster.
1 – Preparation, Preparation, Preparation
Like you should with any intricate project, you want to plan your actions first. Firstly, I would recommend that you practice using the dremel on some throwaway material first to get a feel for the tool, particularly with the diamond bit attachment. Once you are feeling confident, you want to dawn your PPE (eye mask, gloves and facemask) to protect you from any dangers that could fly off the rock or tool.
2- Line it up
Once you have got yourself prepared for the cutting, you want to plan exactly where you are going to be cutting. Without acknowledging your direction, you may face a squint or curving cut that could be undesirable or a flat-out mistake. This is where your marker comes in, to draw your appropriate line on the stone.
3- Secure it
Once you have identified which area of the rock/stone you want to cut you will need to secure the rock in place ready for the commencing of cutting. This is best done using a clamp or vice. Despite limiting manoeuvrability during the cutting process, this is the safest and best option to use when cutting. It’s not advisable to start cutting with the rock in your hand as it can end in blood and gore.
4- Attach the diamond bit
If you haven’t already attached the diamond bit to your dremel for practice, then this is the point you need to do so. Don’t forget it or else you’re in for a seriously long and rugged cut of the stone/rock. It is also handy to have a stack of diamond bits at hand because you will easily go through a few during the cutting process.
5- Start cutting
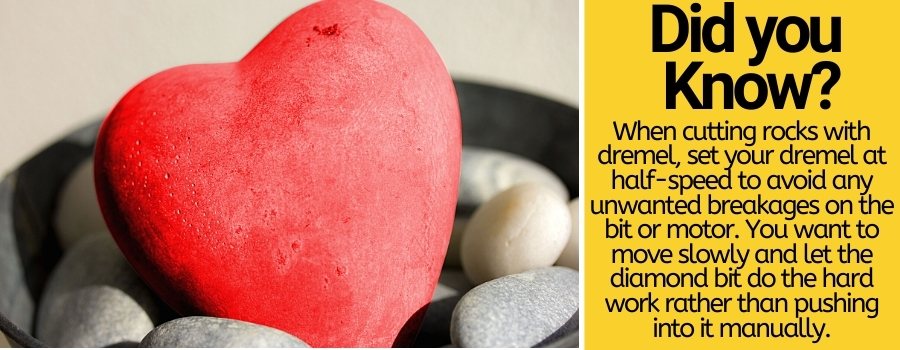
There is a certain technique which works best when cutting using a dremel rather than going straight in on it. Setting the dremel to half speed to avoid any unwanted breakages on the bit or motor, you will want to adopt a 45 degree angle for cutting and use a sort of ’pecking’ movement. You want to move slowly and let the diamond bit do the hard work rather than pushing into it manually. Eventually you should make it through the cut and have a relatively clean, sharp trim on your rock/stone.
(p.s it is important to note here that the diamond bit may turn red because of extreme heat from the friction caused by the cutting. Just take a break and wait for it to cool down again before continuing to cut)
6- Carve, Shape or Polish
Now that you have cut the rock/stone into your desired size, you will not want to start carving, shaping or polishing. This too requires some important knowledge. Luckily, we have got you covered! Have a read on.
Cutting Gemstones with a dremel
Cutting gemstones is much the same process as a rock like above, but there are a couple of super important additional steps that you certainly need to undertake to make sure that you are doing a good job of the cutting.
How to cut gemstones with dremel for jewelry
When cutting your gemstone, extra work does need to go into the process. This starts from the very beginning with your preparation and research stage. When cutting gemstones for jewelry you want to identify which gemstone you are going to be working with and if there are any inclusions in the piece of stone you have. Both of these effect which areas of the rock/stone you can physically cut to have the best outcome.
On top of this preparatory work, when you are cutting a gemstone, you also need to preform the stone before you commence the cutting of a precise area. Using a 260 grit diamond bit, you want to roughly gauge a shape in which the gemstone is going to be cut into, taking into account inclusions and the crown facets. (During the preform you will want to remove the inclusions first, and continually wet the gemstone to make sure the stone remains cool).
Depending on how serious or technical you are about this project will affect this next step. For some early beginners or those not completely into this process, you could effectively start cutting after the preforming has finished. But there is another step which can be taken before cutting to ensure a precise and accurate cut. This is the heating of a dop stick and wax, which essentially provides a handle on the gemstone to allow more precise and accurate cutting. For this step you merely need drop sticks, a hot wax and a heated gemstone to allow adhesion between the stick and the stone.
Best dremel attachment bits for cutting gemstones
Much like when cutting other rocks and stones, you want to use a diamond bit – whether that be a tip or a wheel) on your dremel to perform the cutting of a gemstone. The diamond means you get a clean and precise cut on your gemstone and minimise the chance of cracking or rugged edges to your stone.
Shaping and Carving rocks with dremel
If you have finished cutting your rock into a much more manageable piece of material which can be easily worked on now, you will be looking at trying to shape or carve it into whatever your desired project goal is. Whether that be a heart shape or something more intricate like an animal, you can carve and shape till your heart’s content with the very same dremel you used to cut the rock/stone! These things are amazing.
How to shape rocks with dremel
In terms of shaping the rock, you are going to want to use much the same technique as we went through for your cutting process. Clamping or vicing down the rock/stone into position and using your diamond bit dremel to carefully sculpt the ideal shape that you are looking for. At this stage, you want to be grinding at the rock/stone rather than cutting.
How to carve rocks with a dremel
Now that you have the desired shape of your rock/stone, you are more often than not going to want to carve the rock. This is going to provide a unique ‘drawing’ which will transform the rock from something you could use to skim in the sea to something to be proud to have decorating your home or your body.
1- Prep
Dawn that PPE again, have all your equipment ready and look to clamp or vice your rock/stone.
2- Outline design
Instead of drawing on your lines to cut along like you did previously, for carving you are going to want to create a rough outline of the design you had in mind by firstly drawing it on and then going over the drawing with a light engraving stroke from the dremel. This will mean you can follow the design throughout and have no risk of it rubbing off.
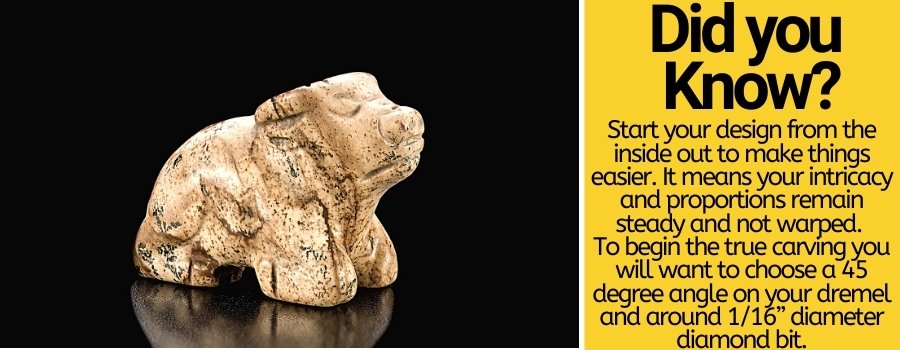
3- Start from the inside
You want to be starting your design from the inside out to make things easier. It means your intricacy and proportions remain steady and not warped. To begin the true carving you will want to sport a 45 degree angle on your dremel and choose something like a 1/16” diameter diamond bit.
4- Take it easy
You will want to use a grinder bit to make sure you smooth over all the edges and create a better finish to your carving. But importantly, whilst you are both carving and grinding you should take it easy as the dremel tip and rock/stone can get super hot. Loads of people recommend dunking the stone in water and carving with it wet. This works, but does strain the eyes as you try and find the design again. Another, perhaps better, option is to stop carving and wet the stone, before drying it with a towel, having a small break, maybe a cup of tea?/ whatever you fancy and then returning to the job later on.
Best dremel attachments for shaping/carving rocks
This does depend on what your design is and how intricate it is. You could be looking at using countless different tips to achieve details. However, regardless of your design you will need a sharp tip bit for the initial drawing of the design and you will also need to have an angle grinding bit, at the very least.
To be honest, in this day and age, it’s much easier (and pretty cheap) to acquire a whole set of diamond bit attachments for your dremel which would help you loads with your carving endeavours.
Of course! It is easy enough to polish your stones and rocks. Infact, I would be disappointed if you had come this far and we’re not going to finish off the project properly. I told you, your dremel can do almost everything didn’t I? With another small attachment and some other stuff you will be able to polish off that rock and have it looking fabulous in no time.
Best dremel bits for rock polishing
For polishing, you are going to want to acquire 2 extra attachments for your dremel. The first of which is a sanding attachment which allows you to stick on different coarseness of sanding paper to the end of your dremel. The other attachment which is super useful for polishing your rocks/stones is fairly self explanatory. It’s a polishing wheel attachment to your dremel.
How to polish rocks with a dremel
Before you start your rock polishing you are going to need more than just your dremel attachments. To polish the stones sandpaper from 600-1200 coarseness is going to be needed, as is a rock polishing compound – these tend to be oxides, but it is worth researching for your specific stone.
1- It’s always the same… Preparation!
Diligence and organisation are key, c’mon, we all want good rocks here! PPE, correct dremel kits, a clam/vice are essential before you start polishing. There is another added step to take when polishing rocks, particularly if you haven’t carved or cut the rock. Soaking the stones in soapy water and scrubbing them with a toothbrush allows for the removal of any dirt that has built up on the stone and means polishing can be a lot smoother.
2- Sand it
Once the stone is clean you will want to start sanding it. This means attaching your sanding attachment to the dremel and equipping it with 600 grit sandpaper. Then going at the rock. You want to continually rotate the rock in the clamp to make sure you are attacking every area of coarseness and grit.
3- Keep sanding it
You are going to want to continue sanding this stone. This time applying an 800grit paper to the dremel to provide an even smoother finish.
4-Not done sanding…
The final stage of sanding is going to use 1000-1200 grit sandpaper on the stone/rock, applying it to every surface of the stone and giving it a finish as smooth as a baby’s bottom.
5- Polishing Wheel time
You are going to want to attach a polishing wheel that is the right size and can fit into all the nooks and crannies of your design. You then want to dip the polishing wheel in the compound which you have chosen prior to starting. Then it is as simple as working the polishing compound into the rock until it is shiny and the rock is displaying its true colour.
Polishing gemstones with a dremel
In much the same way as you polished the stone or rock, you are going to want to soak and then sand the gemstone. However, once that is done, a gemstone does become slightly more tricky. You will firstly want to polish the crown and the top (table). Now the girdle (circumference of gemstone at its widest point) should be polished using a cloth and hand. For a look at a diagram of the different parts of a gemstone have a look here. It is recommended to use an 8k diamond powder paste to polish the girdle and the nooks and crannies of the gemstone as these can be difficult to access with the dremel. Asides from that you want to follow the same technique as used on the stones whereby you switch up your sanding to a polishing attachment and combine it with a compound to make that gem sparkle. And sparkle it will!
Best dremel bits for gemstone polishing
In terms of attachments for your dremel, you will look to be using exactly the same attachments as you did when polishing the rock/stone.
As we mentioned, apart from increased intricacy, polishing a gemstone follows much the same technique as polishing a normal rock. It is just a pretty rock after all!
Polishing labradorite with a dremel
Notoriously known to be hard to work with, labradorite, the mineral rock can produce exquisite visuals when properly looked after. It is a very hard rock and contains minerals which cause it to look shimmery when moved, leading many to shape it for this desirable feature. Because of its hardness, this rock could throw up some problems for your dremel which may struggle a tad to get through it. But with patience and manipulation of the rock you can work the dremels magic on labradorite. Apply the usual technique, but perhaps with caution over how long it may take you. When applying your polishing compound, tin or cerium oxide though up the best results on this mystical gemstone.
How to polish opal with a dremel
Your dremel should do the exact same job on an opal as it will for any other stone. But with Opal you have to watch out, it heats up rapidly. This means constant water breaks and cooling down sessions are needed when working with this gemstone. Indeed, it’s worth also noting that when removing the dop stick you should use acetone or you could face breakages/complete severing of your opal if you try to force it from the dop stick. Cerium oxide is your only polishing compound to use here. But once you do, that orange glow will radiate from this gem.
How to polish geodes with a dremel
Tough on the outside, sweet in the middle. Geodes are perhaps the most identifiable of gemstones. The hollow cavity of crystals on the inside of the rough outer rock has proved a mystery to geologists for time. When polishing geodes you don’t actually even need a dremel really. Because of their nature they remain rugged both inside and out. Laundry detergent and bleach should be able to clean the goede enough that it will not erode and will shine from the inside out.
How to polish agates with a dremel
Formed out of the earth’s fire, agates are a common gemstone found made from volcanic and metamorphic rocks. There are numerous techniques you can use to buff agate and make it sparkle. One of these in the previously mentioned dremel technique. Agate is tough though. This is something to watch out for. Sitting at just 1 point below diamonds on the rock hardness scale you are going to need to take this slow and steady to achieve good results.
How to polish amber with a dremel
This well known orange gemstone which originates from fossilised tree resin (completely nuts that it turns out like that) is a popular gemstone. It is because of this nature that amber can be slightly problematic when working on it. It firstly tends to come in smaller chunks than some of the other gemstones do, so typically it can be more awkward. Additionally, because of its origins amber is very susceptible to chemicals. This means you have to be very careful what polishing compound you plan to use on it or you may run the risk of disintegrating your gem. Asides from that, it’s business as usual.
How to polish obsidian with a dremel
Known for its dark beauty and mystery, Obsidian is a treat to work with for many. Malleable in its carving and easy to cut obsidian has been used by people for centuries. It is, however, notoriously difficult to polish. The key to overcoming this difficulty is sanding it finer. Following the guided step-by-step above you need to add in one extra step and that is sanding obsidian using up to 3000 grit paper. This produces a much finer polish and once you dab that aluminium oxide on it you will almost be able to see your reflection in it.
Polishing sea glass with a dremel
It’s almost like the dremel was created to work with sea glass. Firstly, you want to make sure you are working with real sea glass as that has become an increasing problem for many over the years as companies and people abuse the nature of the gem. Once you do that, the dremel is your go to. Following the directions sea glass is easy and great for the dremel. You should have absolutely no problems working on it here. Cerium oxide is your best shout for the final polish giving it that shiny look you will be after. Easy peasy!
You can use the same process as cutting but instead you draw on the face of the stone with your marker, use your diamond bit dremel and engrave away. Easy!
Faceting stones with a dremel – How effective is it?
Surprisingly really effective. Dremel tools work remarkably well particularly when faceting gemstones. Lapidary has been revolutionised by dremels it must be said.

 We are gonna dive into a step-by-step guide on how to cut, then shape, then polish your rocks and stones.
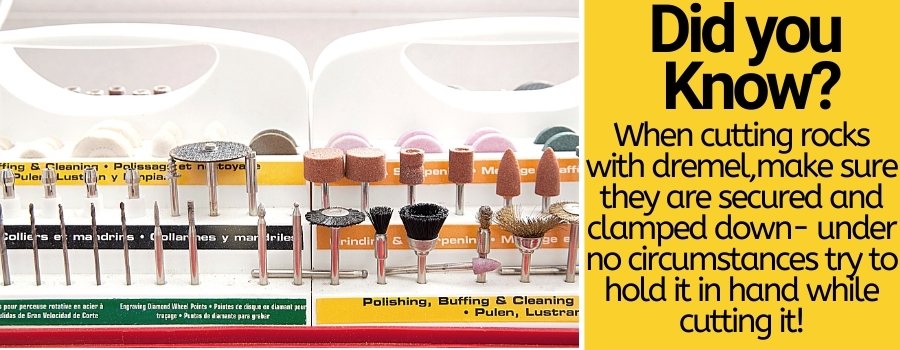
")
")

")

")